©2009
Page 2: scans from different Gameboys compared
Page 3: Gameboy operating instructions
Page 4: how to make a scan
Page 5: some experiments
Using the Gameboy camera:
*pdf version of Gameboy camera instructions
*There is a link under each Gamboy diagram at the right for a pdf version of each diagram.
In general:
*Always turn off the Gameboy before pulling the camera out.
*It takes several seconds for the camera to adjust to the light or to focus.
*Moving objects will be blurry.
*Close-ups are sometimes more successful.
*The camera works great in available light indoors. Seems like the equivalent of ASA 1000 film to me.
The main buttons:
*The cross shaped button navigates around the screen. It also adjusts brightness and contrast in “shoot” mode.
*The A button - “yes” or “do this.”
*The B button - “no” or “cancel.”
*There is also a select button.
To turn the Gameboy on:
* The switch is in a different place on each model. Check the instructions to the right for your camera. Also in the right hand column are links to pdfs with diagrams for the Gameboy Color, Gameboy Advance and Gameboy Advance SP.
The menu options:
Below are the ones that I have tried. I'll call the first three screens "Mario dancing," "shoot/view" and "shoot/check." You get to each in order by hitting the A button. The B button takes you back one screen.
Taking photos:
*The first screen you see when the camera is turned on is Mario dancing. Press the A button to get started.
*The cross shaped button navigates around the screen. When you see the three cameras with white staring eyes, choose "shoot" and press A.
* Choose "shoot" and press A again.
* At the top of the screen you see the number of shots left. You have a total of 30.
* Aim the camera, wait a couple of seconds for the image to settle.
*Adjust brightness and contrast with the navigate button. There is a scale on the right and bottom of the screen.
* Press the A button to take the photo.
* Choose A to save the photo or B to erase it.
Delete shots:
*From the shoot/check screen, choose "check" and press A.
* With the navigation button, navigate to the photo you want to delete. Press select button. You see the “delete” option on the bottom of the screen.
* Press down with the navigation button and press A.
* Press A to delete or B to go back.
Flip vertically or horizontally:
*From the shoot window, where you take photos, the select button takes you to the "dither," "flip," "palette," and "shutter" options.
*Use the navigate button to make your choice and hit A.
On the same screen that shows the "shoot" and "check" modes, you can access the "items" - self timer and time lapse - and "magic" includes a panorama feature
previous 1 | 2 | 3 | 4 | 5 next
All text and images ©Judith Hoffman 2009
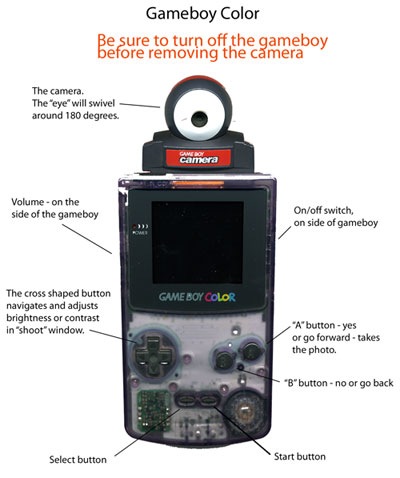
Instruction sheet for the Gameboy Color. pdf version
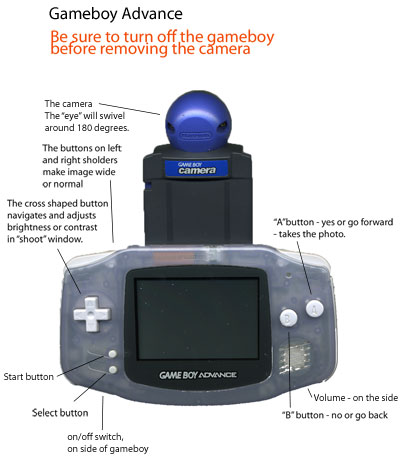
Instruction sheet for Gameboy Advance. pdf version
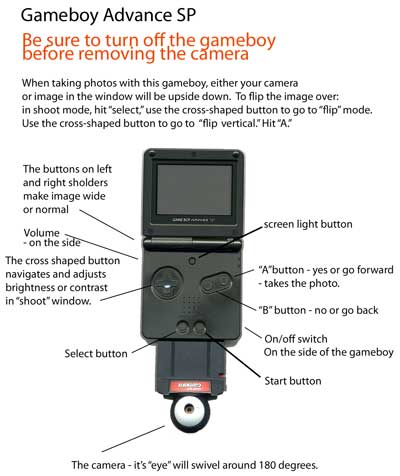
Instruction sheet for Gameboy Advance SP. pdf version