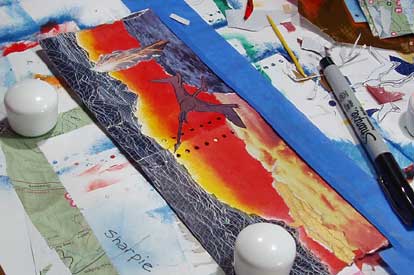
Collage Demo: Part Two
On the pair of pages I’m working on I have already collaged on the ground, sky, clouds and some fire that represents volcanoes. I drew a small pterodactyl on a photo of some rough ground from a magazine and cut it out. When I am sure of the position on the page, I make a few small pencil marks just UNDER the edge of the pterodactyl. When it is glued in place, the pencil marks will be covered.
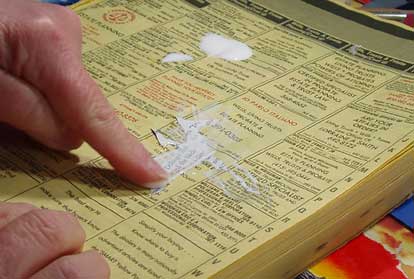
I put a dab of PVA on one corner of a phone book page and use my finger to apply it to the back of the pterodactyl. I try to keep the layer of PVA thin, so it doesn’t seep around the edges too much, but it needs to be thick enough to adhere well.
It’s tricky to pick up complicated shapes. Here I am using my fingernail. A palette knife also helps. I transfer the pterodactyl with glue on it to my book page and press it down. My scale is so small I can push air bubbles out with my finger.
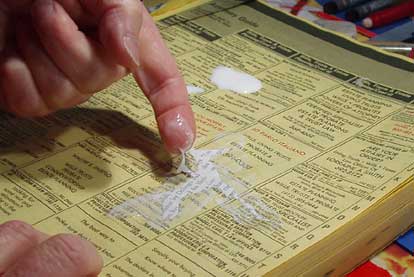
I am pressing down the pterodactyl with my middle finger, you can still see the PVA on my first finger. I have a barely damp cloth and a dry cloth nearby to wipe my fingers if needed. Often a bit of PVA seeps out from the edge and needs to be cleaned up.
I take the damp cloth and blot off that area quickly, then blot it with a dry cloth. If you’re using magazine images or other soft papers, don’t let them get too damp and don’t rub them. The book page is barely damp at this point. If I still see PVA around the edge of the bit of paper I blot it with my clean fingertip. This either removes it or makes it matt so it doesn’t show.
There are other tutorials on my web site.
Thank you Jim for taking the photos.
I put a dab of PVA on one corner of a phone book page and use my finger to apply it to the back of the pterodactyl. I try to keep the layer of PVA thin, so it doesn’t seep around the edges too much, but it needs to be thick enough to adhere well.
It’s tricky to pick up complicated shapes. Here I am using my fingernail. A palette knife also helps. I transfer the pterodactyl with glue on it to my book page and press it down. My scale is so small I can push air bubbles out with my finger.
I am pressing down the pterodactyl with my middle finger, you can still see the PVA on my first finger. I have a barely damp cloth and a dry cloth nearby to wipe my fingers if needed. Often a bit of PVA seeps out from the edge and needs to be cleaned up.
I take the damp cloth and blot off that area quickly, then blot it with a dry cloth. If you’re using magazine images or other soft papers, don’t let them get too damp and don’t rub them. The book page is barely damp at this point. If I still see PVA around the edge of the bit of paper I blot it with my clean fingertip. This either removes it or makes it matt so it doesn’t show.
There are other tutorials on my web site.
Thank you Jim for taking the photos.
Labels: Classes and Demos, Collage
posted by Judith Hoffman at 7:27 PM
![]()
![]()

0 Comments:
Post a Comment
Links to this post:
Create a Link
<< Home