Monday, March 09, 2009

Judy Times


From Sally Cruikshank's blog, here's a font generating web site that will make a free font in your handwriting. Download a template, write your letters on it, scan it, upload, and presto-chango! you have your own font. Imagine making a "handwritten" artist's book on the computer.


There is a part 2 of the template that allows to to make unusual characters - like an "a" with a tilde over it. Instead I made some dingbats. Warning: I couldn't find a way to type all the characters on their template, so I only filled in the ones that I knew I would be able to find later. I'm using a character palette app that comes with the mac.

Labels:

Wednesday, July 11, 2007

Simple boxes for books and digital caliper


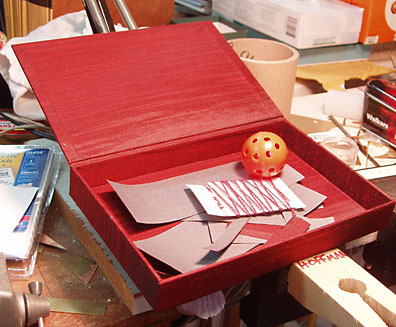
Don Drake gave a fantastic box making demo at a BABA meeting a few weeks ago. Over many years he has developed a simple box plan that is quick and easy, as boxes go. His instruction was so clear my demo box came out impressively good. In the photo above I haven't glued down the bottom liner yet. After watching him measure box parts with a caliper, I decided I needed one.


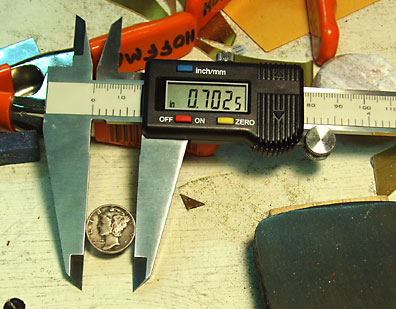
My caliper came from micromark sometime last week. I don't usually buy complicated tools, preferring the simplest approach possible to anything. When I am measuring that usually means lining two pieces up and making the second match the first. But the digital caliper will switch from inches to millimeters with the push of a button. I don't think these are entirely accurate. In the photo above the dime I measured is between .700 inches and .7025 inches, depending on some mysterious force in the universe. But it's plenty accurate for my needs.

If you're considering buying a caliper, check out this Wikipedia article. It says the dial calipers last longer.

Labels: ,

Saturday, June 30, 2007

What tools should I buy for a metalsmith?


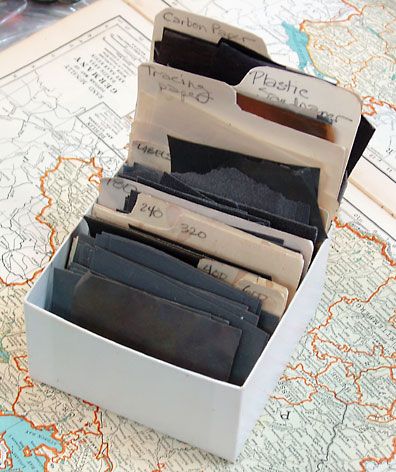
This is how I organize little bits of tracing paper, sandpaper and labels. It's a business card box, I cut the dividers from a manila file folder.

I got an email today from someone asking what tools he should buy for his girlfriend. He says "Would you be willing to make a list for me of some nice equipment that would help her get started in her field as a metalworker? I want to get her a flex shaft definitely and any other items that would prove useful for her. I apologize for my lack of knowledge on metalworking, but hopefully you could steer me in the right direction."

Here is a list of tools for metalsmiths from the orchid mailing list. I have been meaning to add this to the links on my web site. It looks like a good list of basic tools. Maybe you could leave out the t.v., though. I am anti-television myself. How about a nice stereo instead?

Although Don suggests buying locally when you can, my personal experience is that you pay more for poor quality when you buy locally. This is based on one bad experience. I bought a jeweler's saw in Daly City, California years ago. It required a pair of pliers to tighten the nut that holds the blade in place. This really slowed down the working process. I still keep it around to show students what to avoid. For the same price I could have had a lovely one from Rio Grande that is a pleasure to use.

Although Rio Grande charges for their catalogs, once you place an order, you get them for free. They are huge and full of useful information. I am not affiliated with them in any way, just a happy customer. They have great customer service, too.

While you are at the Orchid site, check out the rest of the site.

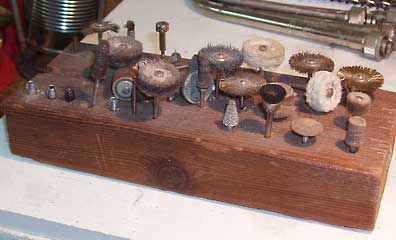
And think about what you can make, instead of buying it. The file box for sandpaper, above, and the drill bit holder work as well as anything you buy. They could be prettier, but they make me smile when I see them.

Labels:

Saturday, June 16, 2007

MicroMark Summer Sale


Because I like to include a picture with my blog entries, this is a homemade holder for my flex shaft accessories. You can make all kinds of simple tools to fill your needs. For this one I found a drill bit slightly larger than the shafts on my tools, and made rows of holes in a scrap of wood.

One of my favorite places to shop for the tools I don't make, MicroMark, is having their summer sale. It ends on September 11. Some good things: a gauge for drill bits and screws; #10123, a ball peen hammer for riveting; #22119, or a chasing hammer; #80811. They also have drill bits and brass and copper sheet metal and tubing.

I don't buy cutting hand tools from them, like wire cutters. I find the less expensive cutters just don't cut well. But I think for the "passive" tools like hammers, lower priced things are usually okay. I haven't used their digital calipers; #83857, but have ordered a pair for myself. I'm hoping they will be middle of the road - not too expensive, not totally precise. I also ordered the metal bending brake, #82817. It will be fun to test these out.

If you are considering a tool, look closely at the gauge specifications. Their claim that the bending brake will bend metal up to 16 gauge may be too optimistic. I think 20 gauge would be fine, though. I'm not sure about their power tools, either. They sometimes claim they work on both wood and metal, but they may not be powerful enough for metal. I haven't used any of them.

These optimistic claims aren't unique to MicroMark, I don't mean to imply that they are dishonest. This is a common thing that happens with tools. They may work at their maximum occasionally, but doing it all the time would wear the tool out too fast. And I am a tool snob. I like tools that last forever. It annoys me to use a wire cutter for a couple of years and find it has little nicks in it and won't cut anymore.

Labels:

Saturday, December 02, 2006

The Antikythera Mechanism


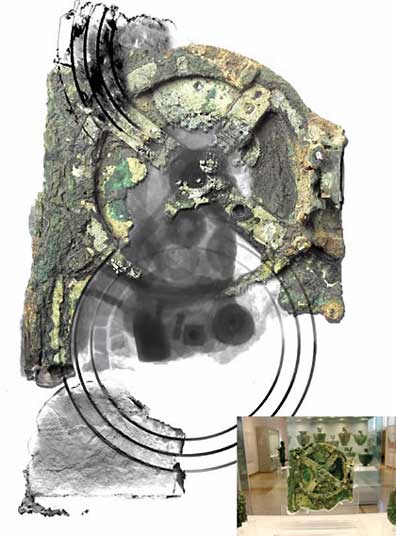
This is a bronze device found on a sunken ship near Antikythera, in Greece, that is almost 2000 years old. The image above comes from an article in Nature. This device was able to calculate a number of astronomical events. It's not clear exactly what functions it was built to perform, but it's a very complicated instrument with at least 30 gears. Check out this wikipedia article.

Why am I interested in this? Well, I am fascinated by archeology and ancient brass instruments. This seems to be the earliest known instrument of it's kind. I don't have the patience to sit and read the details on the computer screen, but the images are enchanting and inspiring. It is amazing that people 2000 years ago could build something this complex. I wonder what tools they used to shape it? And it seems to have been fairly accurate. This is not the kind of thing covered in art history classes. I always feel delighted when I find something like this.

Labels: ,

Friday, December 01, 2006

Crimp this! Crimp that!

We had our heat worked on several weeks ago. One of the guys left an interesting tool one day. I immediately took it into my studio to see what it would do. (I did give it back the next day!) It was a crimper, used for making heating ducts a little smaller, so they fit together well. Erwin's crimper was a three blade version, with a very nice handle. He says they don't make them any more. Too Bad.

I did find an assortment of them on the internet, and ordered one made by Malco. It has five blades, they do also make three bladed crimpers. It feels very solid and has a nice handle. Today I was waiting for the inspector to check off the work, so I played with some copper. I used 24 gauge annealed copper for most of the tests. For one test I used tooling copper, which is around 30 gauge, and very soft. I sanded the copper pieces with 400 grit wet or dry sandpaper first. Then they were dipped in liver of sulfur, polished with a very soft brass brush. I repeat this until I like the color. Then I crimped in different patterns.

I like the look better than the metal crimpers that look like pasta rollers. (I have no idea what they're called.) This irregular texture is more appealing to me. However, it's a fairly large scale texture and might not work for jewelry. The crimps are about 1-7/8 inches long and 1/8th of an inch deep. It isn't a sharp fold in the metal. Below are the results. If you want to see these enlarged, check out my flickr photo set, Testing.


Sample one. This is the pattern I get crimping along one edge. This piece of copper is 24 gauge, about 4 inches wide.


Sample two. I was trying for rays here. I think the three blade crimper would be better. This is 24 gauge copper, about 2.5 inches wide.


Sample three. This is a piece of tooling copper, about 30 gauge. I scribbled on the back with a ball point pen, then colored the metal with liver of sulfur, crimped from both sides, and colored the metal again. 4 inches wide.


Sample four. I crimped from all angles, sometimes crimping over other crimps. 24 gauge copper, 2.5 inches wide.


This was sample four, hammered almost flat. This one starts to get interesting to me. A little more crimping and hammering might make it very nice.


Here is the back of sample four, I think it could be interesting with a little more sanding and coloring.


And this is sample two, hammered almost flat.

Labels: ,

Saturday, September 02, 2006

Dear Nancy and etching supplies

charms
Months ago Nancy Rushton emailed me and asked if I know how she could make charms like these from Wells Ware.

I just found these instructions from Volcano Arts. Nancy, I hope you see this, I'm sorry I've lost your email.

In their "Metal etching tools and supplies" they also have ink pads with solvent based inks for etching on metal. I'm afraid I'm going to have to place an order. (Research, you know.)

Labels:

Wednesday, January 25, 2006

Economical Flex Shaft

Browsing through a recent Art Jewelry Magazine , I saw a review for an Economy Flex Shaft from Contenti. Here’s a quote from the review: “The motor runs smoothly . . . Other features such as the chuck, hand piece and shaft all appear equal in quality to similar products . . . For the student or dedicated hobbyist this flex shaft is an excellent value.”

Flex shaft machines are enclosed motors that hang above your worktable, with a shaft that comes down and drives the drill bit. The handpiece has jaws, like a household drill, that open and close with a chuck key. Flex shafts are convenient because they have a foot pedal, leaving both hands free. The contenti economy model costs $66, and has a 90 day return guarantee. The product number is 236-971. If you bought this you would also want a way to hang it. Contenti has a holder for flex shafts that screws to your work table for about $17, product number 236-012. (I hang my flex shaft from a large bicycle hook screwed into the rafters in my studio – just make sure it’s not going to fall.)

I have to say, I’m not affiliated with Contenti in any way, and don’t think I have ever ordered from them. I don’t know how long this flex shaft would last. They say they tested it under all-day-use with good results, but they don’t recommend it for that. To me, this means it’s not strong enough for a classroom or production jewelry shop. But it might be great for one person doing a variety of tasks. I am considering buying one for myself. I have an old flex shaft I bought used that has been altered, and I keep expecting it to break. During the classes I teach in my studio, it can get very hot.

Labels:

Sunday, January 15, 2006

Coiling Tool, Part Two

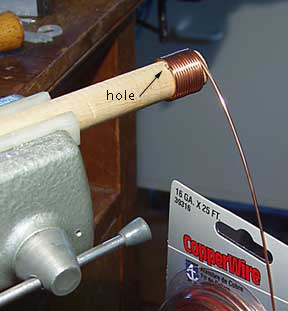
After ordering the coiling tools I mentioned in the coiling tool entry, I thought it would be easy to make one in any size I needed. Here’s how to make one: Take a 5/8 inch dowel, and drill a hole about 3/4 of an inch from the end with a #34 wire drill bit. The hole can go all the way through, or not, it doesn’t matter. You could also make one with a piece of brass tubing, which would be a little harder to drill. Of course you can vary the size of the dowel, and the hole size doesn't matter much, it just needs to accomodate the wire sizes you use.

Make a coiling tool by drilling a hole in a wooden dowel

To use the tool, hold the wooden handle in your dominant hand. (I am left handed.) Put the end of the wire in the hole in the dowel. Then you twist the dowel away from you, supporting the coil with the first finger of your other hand, and holding the wire between your thumb and first finger. There is a photo showing the hand position in the the coiling tool entry. Note that you can form the coil to your left or right. I think for most uses, going toward the long part of the dowel is better, you can make as many twists as you need.

I have been teaching my students to wrap their wire around a dowel held in a vise. I find it’s much more natural to twist the wire onto the coiling tool. The wire is easier to control and keep smooth, and it doesn't need to be pre-cut. The hole keeps the wire from slipping. To free the wire you’ll have to cut it next to the hole with a wire cutter. This is easy because the first wrap doesn’t lie flat against the dowel. The first few wraps will probably not be attractive, so make a few extra. If you wanted to make jump rings you could free the wire and then use the dowel to support the coil while you cut them.

I think the smaller diameter tools from Anima Designs might still be worth buying if you make lots of coils. Wooden dowels are easy to break in the thinner sizes. But if you need a larger size tool, it’s so easy to make your own.

Labels:

Thursday, January 05, 2006

New Tool! Making Coils

I love tools. There is nothing more satisfying to me than to be able to go into my studio and find the right tool for the job. Metalworking requires some basic tools that aren’t that expensive. But once you’re hooked, you suddenly need three different jeweler’s saws, an assortment of hammers, files, and . . . the list goes on and on. Today I am supposed to be working on my dinosaur book, but instead I am playing with some new tools.

I saw this coiling tool at Anima Designs and had to have one. One thing I teach in my classes is how to make spiral bound books. We make the spiral by wrapping a wire around a dowel.
Here's an example of a spiral bound book.

Coil tool

This coiling tool is another way to make a spiral. I found it easy to control. It would work well for smaller coils. The largest size they sell is 3/8 inch, a little small for me. I use up to 3/4 inch dowels for my spiral bindings. But I’m thinking it might be possible to make larger coiling tools.

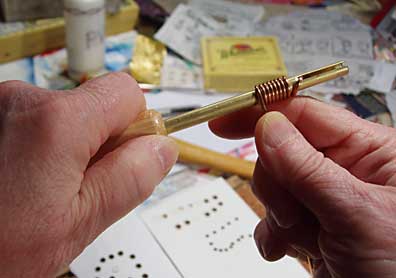
The instructions are very brief, but this method works well for me: Cut a piece of wire. You will have to guess how much is the right amount. Don't let your wire get kinks or little bends in it. Hold the wooden handle in your dominant hand. (I am left handed.) Put the end of the wire in the slot in the brass tubing. (on the right in the photo) Then you twist away from you, supporting the coil with the first finger and holding the wire between your thumb and first finger. The tool feels very natural to use and the wire feeds on smoothly. Try to get each new turn in the coil lying against the side of the previous one. Also try to keep the wire at a right angle to the brass tube of the coiling tool. If you want your coil spread out, wait until you slide it off the tool, then grab it by the two ends and pull gently. This way the distances between each coil will stay consistent.

Labels: